LinkWithin

Related Posts Plugin for WordPress, Blogger...
Showing posts with label DIY. Show all posts

Tuesday, July 24, 2012

Design on a Budget


Like I said in my updates post yesterday, we found out a few weeks ago that we are having a baby boy! I couldn't be more excited about this, although I always pictured myself only raising girls. I thought that finding out I was actually carrying a boy might disappoint me. Much to my surprise, I was immediately "OK" with this news, and soon I was downright excited! I really can't explain my feelings toward this news other than excitement and anticipation. Scott seems excited too, with one exception. His only reservation is that having a baby of the opposite sex from our first means one thing: shopping! If we were having another girl, we would be set! Elliott would get an upgrade to a new and improved big girl room, and baby #2 would slide on in to the already prepped nursery. Since baby #2 is in fact a boy, it means that things are taking a little more planning and some creativity :)

We are on a budget, but at the same time, home decor and baby stuff in general is just so fun to buy! Lucky for Scott, I've always been a bargain shopper......I don't know if it's the thrill of the hunt (or just years of having to be frugal with our money), but I love a good deal! In fact, I probably never buy anything that isn't on clearance (other than food, but only if it's a necessity and there isn't a cheaper option available). Clothes, furniture, and other home goods just make me feel so good when I can tell you how much I saved in comparison to how much I spent!

So, like I said, adding another little one to our family is taking some creativity and bargain shopping. Let's start with the big stuff. Furniture. We have a crib (Elliott's current toddler bed), and an armoire for the nursery, plus a nice glider rocking chair. Essentially, this could all be used for the new baby, leaving us to furnish a room for Ellie with a bed (twin size) and at least a dresser (maybe a nightstand if we found a good deal).

Thanks to Craigslist (and my awesome parents who found us this steal), we got a 5 piece bedroom set, which needed just a little bit of TLC, for just $100! This set included a nightstand, dresser, dresser with shelving unit, headboard, and bed frame! The only work that we ended up doing to these pieces was a fresh coat of spray paint (thanks mom!) and some new drawer pulls. Easy Peasy! And, since we have a small house with even smaller bedrooms, there are more than enough pieces of furniture to go around now......maybe even too much! These pieces will be split between both Elliott and Liam's bedrooms:

We found Ellie's mattress and boxspring at a local mattress discount store.......$200 isn't exactly a steal in my opinion, but the set is brand new, and should last her some time. We really weren't keen on a used mattress of any sort.

Both rooms will be getting a fresh coat of paint. And once again, there's no real way around paint prices, at least not that I know of! We simply bought two cans of paint + primer in one, at a local hardware store. It didn't break the bank, and fresh paint will more than liven up both rooms!

Finally, I've been slowly shopping around for decor pieces, curtains, rugs, and other accents to give both kids a space that looks nice, feels comforting, and makes all of us happy. Things like this aren't exactly necessities, so this is where I really try to pinch pennies and find bargains. I end up picking up a clock at Ross when I see a good deal, or a few smaller items at Hobby Lobby when I'm there.......before I know it my $5 and $10 purchases have furnished a whole room! So, while there's too many little details I've picked up over the last few months to share each steal of a deal with you, here's my latest haul. I walked into Fred Meyer looking for a few storage baskets for toys in the living room, and walked out with those and much more! They were having such great sales, and there were clearance shelves and racks in every department! Here's what I snagged:

The storage baskets are for the living room, to contain toy explosions. The blue containers and light fixture (such great deals!!!) are for Liam's room. We're going with dark blue, brown, and a loose sports/football theme for his room, but I'll get into more of that in a later post. The blanket, curtains, and coat rack are for Elliott's room. We're just throwing together LOTS of fun, bright colors for her new big girl room......can't wait to share when it's all put together!. And finally, the baby boy clothes and the Barbie might have been impulse buys.......but they were still on sale! Ha!

So there's just a little bit of what's been occupying my mind and budget lately. I love a good deal, but I'm also anxious to finish a project once I start one! The hardest part is moving slowly as we gather everything that we need for these two rooms, but I know that the end results will be worth is! The rooms should be painted this weekend, and I can't wait to start pulling it all together after that!

Photobucket

Friday, February 10, 2012

My Little Valentine

Valentine's Day is one of my favorite holidays. 
Err, scratch that. 
Valentine's Day is one of my favorite holidays to prepare for. 
The actual day itself usually kind of sucks for one reason or another. 
But the hearts and the candy and the flowery centerpieces I love. 
To the cheesy valentines and random acts of love/kindness that the holiday brings about I say "bring it on"!!

I know Elliott is not old enough to "get" it yet, and in fact she doesn't even have any classmates to hand valentine's out to just yet. But, that's okay. I'll use her as a fabulous excuse to whip up some cute little valentine's and I will pass them out to all of my her good friends!

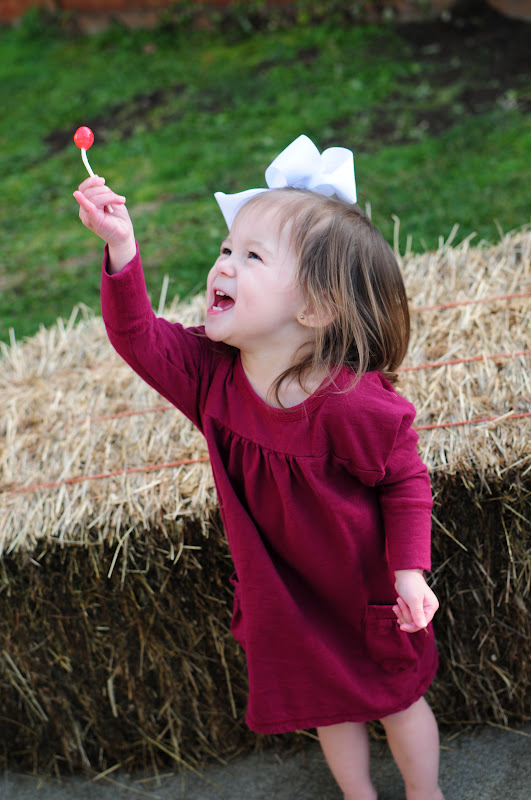
This idea may be SO last year, but I couldn't help myself! I thought that Ellie would be a little more cooperative for these photos, but who was I kidding?! She's two!!
So, without further ado, here are Elliott's Valentines:


I can't wait to hand them out to all of OUR friends next week ;)

And, as promised, here are the rest of the pictures and some outtakes.....all of this for just one picture!!


And finally! We have a winner!! 
It's not the typical pose for this particular valentine, but it was as 
good as it was going to get for us:
I photoshopped out the sucker, and replaced it with a real one. I added the text in photoshop as well, and then printed them out at Costco. I'm so please with how they turned out! 

And now I am curious and in the Valentinesy mood.....so, tell me, what's the most creative valentine you've seen?  

Photobucket

Thursday, January 19, 2012

Copy Cat

Today I'm admitting to you that I'm a copy cat. Not only that, as crafty as I might seem at times, if the craft doesn't involve hot glue, tape, or my cricut machine, I probably can't copy it.

As I'm prepping for Ellie's birthday party this weekend, I wanted to share one of the smaller details......because it might be small, but I'm SO excited about it!
I copied this directly from The Paper Mama, and I'm not ashamed! She's some kind of genius, I tell you, because I never would have thought of this on my own! Be sure to check out her version here. She gives you the super simple instructions, too.

I present to you, the birthday candle:

This project took all of about 10 minutes, and cost next to nothing (I had all of the supplies except for the candle), but I love the pizzazz that it's going to add to this party! Here's what you do:

1. Take a large number birthday candle, and quickly lay down a layer of hot glue over the top of it. This is just a base layer, you're not adding any jewels to it yet! (as Chelsey explains, you need this layer, otherwise gluing something to the wax candle just isn't going to work). You can cover the whole thing, or leave the colored edges alone if you'd like. I wanted the red to show, so I didn't glue over the border. Also, you must work quickly, and not mess with the glue. I tried to rub it around and make it even, but by doing that I started melting the candle and it could have ended up with weird potholes and stuff.....so just, don't do that ;)

2. After the base layer of glue is good and dry, it's time add another layer of glue, and the jewels! I used red, yellow, and gold. I thought those colors would fit nicely with the Cowboy theme we've got going on. Now again, the only trick here is to work quickly and don't "mess" with the glue too much. Keep it simple.

3. Enjoy your new, snazzy, less-than-$5-total candle ;)

The Paper Mama also linked to what appears to be the original source (and should get the credit for) this wonderful idea! Check out this blog here for another great example of a blinged out birthday candle! I wanted to add this because in this day and age of Pinterest, it's hard to tell who should get credit for an idea.....I do the best I can!
Photobucket

Thursday, November 3, 2011

10 Minute DIY

Do you have ten minutes? Good! I have a project for you!
This particular project is something that I've had in mind for quite a while now.
Posts like this one and that one inspired me further.
They made it look so simple, so I decided to go for it!
This easy DIY photo display took me all of about ten minutes (and $0) to round up all of my supplies and get to hanging pictures!
You will need:

Hammer
Nails
Ribbon
Clothespins or cute clips

I happened to have all of these lying around my house. Maybe you do, too!
If not, I can't imagine your supplies costing anything close to a fortune.
I used two different kinds of ribbon. The top layer is thin, but it matches the pattern in my kitchen/office perfectly. I layered a thicker, sheer black ribbon underneath. I didn't measure or use a level (although I probably should have.....I'm just lazy!), so I just eye-balled it and started nailing the ribbon to the wall. Make sure that it's snug.....most types of ribbon will stretch ever-so-slightly, and once you start hanging pictures on it, it won't appear to be so tight.
I love how easy and quick (and cheap) this project was!
But most of all, I love how it spiced up my workspace, and lets me display many pictures all at once!
If you make your own version of this picture display, I'd LOVE to see it!!
Photobucket

Wednesday, July 13, 2011

Oh-So-Pretty

I've really been getting crafty lately.
And, as cheesey as this is going to sound, the thing I love most about it is seeing all of the "pretty" things I can make! I know I talk about it a lot (and if you're one of my co-workers, I apologize for bringing all of this craft-talk into the workplace), but that's because it brings me so much joy! Honestly, I love to sit back and just stare at some of the things I've created sometimes, because they're just so pretty!

This yarn-wrapped wreath is my newest creation, and I'm so pleased with how it turned out!
It was super simple, and I made it while watching my favorite TV shows (score)!
I love that something so simple can bring me such joy!
And the best part? Bringing other people joy with my crafts!
I've been blessed to make various items for friends and family members lately, and it is the best feeling to see their delight when I present them with what I've made!

If you absolutely have to have one of these fab yarn wreaths,
you can get your hands on one right HERE.
And, if you could spare two clicks and vote for us, that would be great! Muah!Click To Vote For Us @ the Top Baby Blogs Directory! The most popular baby blogs

Photobucket

Thursday, April 28, 2011

BIG NEWS!!!

(no, I'm not pregnant)

I just opened my own Etsy shop!!!


Please go check it out, and if you're on Etsy I'd love to be one of your favorites :)
(of course I'll return the favor if you heart my shop!)

I've been thinking about doing this for a looooong time now, but I don't know what it is......once I actually added items for sale last night, I just got really nervous!

Nervous that it will go well and I won't have the time to fill all of the orders (umm, let's not get ahead of ourselves, right?)!
Nervous that no one will like what I'm selling, or there just isn't a market for handmade paper crafts.

I have already invested a lot into this, and I put a little piece of my heart into every card and scrapbook that I make (I know it sounds cheesy but this really is the honest-to-goodness truth)! I would be bummed if it didn't pan out the way that I expected it to. In reality, I'm not sure how I want it to turn out!!

But I do know that I love this blogging/Etsy/momma/crafting community, and I just want to share my gifts and talents, too!
I love supporting other sellers, and I buy handmade as often as I can. I hope to make enough to support my addiction hobby, and I want to bring a little bit of sunshine to people through my hand-made, personalized crafts.

So spread the word, and check out Prettiest Littles. We appreciate it oh-so-much!

~Amanda

Tuesday, April 19, 2011

Fun With Chalkboard Paint

I've been wanting to try out chalkboard paint for a long time now.
I had visions of painting entire walls or closet doors in chalkboard paint, just because I think it looks like fun!
But when it finally came down to it, I couldn't do something so permanent. We just painted almost every wall in our house, and I really never want to paint again. That means when it's time to move, I don't want to have to be covering up chalkboard paint. Period.

So I got creative.
I managed to find three matching picture frames around the house that we just weren't using. I took out the glass and the mats, and painted to "hardboard" with chalkboard paint! Easy peasy! No measuring, no cutting....just a little black paint which, by the way, is super quick and easy to clean up!

The cost for this project was very minimal.
Chalkboard paint: $14
Frames: found in my hall closet
Chalk: $1
Bucket: $1 (Target's dollar spot!)
Hook: $1

Grand total: $17 !!!


I thought that these chalkboards were the perfect thing to finish off the play area that I set up for Ellie in our kitchen. I had to take the leaf out of the table and move our dining room to the far end of the kitchen to make room for this play area, but so far it's been worth it! Elliott loves this little space that's all hers.


The chalkboards are at her level, and her playhouse gets used on a daily basis. She often grabs my finger and pulls me into the kitchen to "play". She'll ask for chalk to color with, or simply walk into the playhouse and be content to have me watch her from outside the playhouse door.
Honestly, these moments of early childhood are just the best, and I'll never forget them, as long as I live.

Click To Vote For Us @ the Top Baby Blogs Directory! The most popular baby blogs

~Amanda

Thursday, April 14, 2011

Ellie's New Room

Elliott's room didn't need a makeover, but I, acting on a whim (again), decided it was time to freshen things up a little bit. I did this change with very little cost.

First, I must deeply apologize for these horrible pictures! I'm still learning how to use my camera, and the bedrooms in our house have the worst lighting.Ever. Sorry!

Here are the before pictures:
Photobucket

Here's what we did:
~Removed rocking chair and fan
~Added pink rug
~Moved armoire
~Added small white cabinet (used to be in our kitchen)
~Hung and/or moved clock and wall hangings
~Removed front of crib to make it a toddler bed
~Purchased and hung paper lanterns
~Purchased and hung chandelier
~Removed mobile (the top is removeable, so we can still use the base as a music player)
~Added baskets to hold books and toys (these baskets were free....I won them playing Bunco! Ha!)

Here is the finished product!
Photobucket

The total cost for this transformation was $70
(Rug - $20 at Target, Chandelier - $40 at Ikea, Lanterns - $10 at Walmart)
Most items were hand-made, hand-me-downs, or found around our house!
Photobucket

Ellie has been doing great at sleeping in her big girl bed! I was shocked, because I really thought we'd be putting the front of the crib back on the same day we took if off, but she's been doing very well with this change! I'm glad too, because I like the fact that she can get in and out of her own bed. And I think she likes that, too!

Photobucket

I love the way her room looks now, and I feel like it's a little more kid-friendly. Despite how the pictures may look, Ellie's room is now bright and cheery! It's also a lot more open, and there are even a few soft toys and books for Ellie and I to play with now when we spend time in there. Elliott loves the new rug, and she will often lead me into her room just to lay on the rug and "pet" it. It melts my heart every time!

My absolute favorite additions to the room are the chandelier (which still needs some work....we've gotta do something with that extra cord and chain!) and the lanterns. I'm so happy with how this room makeover went......even if it was on a whim!

Photobucket

Photobucket

~Amanda

Monday, April 11, 2011

On a Whim

I've been doing a lot of things "on a whim" lately. I'm not sure what it is.
It feels almost like nesting. No, I'm not pregnant.
I have all these crazy ideas......things that I have to do right now.
I'm notorious for starting projects and never finishing them.
So maybe I'm making up for lost time?! Maybe I just got sick of never completing anything, so now I'm starting and finishing big ideas all in a matter of hours.

Our little vacay this last weekend was one of these whims. I'll get to that tomorrow, I promise!

Elliott's room was something that I tackled last Friday, for no particular reason at all! I just decided that it was time for a change! I've been feeling lately that I really want our house to feel more like a home, and be more personalized to us. Ellie's room was the easiest (and cheapest) place to start. I'll share the room makeover details later this week because I think it really was a cool transformation! However, it turned into something much larger than I had originally planned. At first, I was just going to rearrange the furniture a little bit, and hang up a few more pretty items around the room.

Well, over the course of just a few hours, Elliott's room was completely changed. From a baby's nursery.....into a little girl's room! I was so excited about all the changes, but once it was finished I became sad. I cried a little.

The biggest change was converting Elliott's crib into a toddler bed (something that I hadn't even thought about doing right now......I told you, it was a whim). That change happened right before bed time last night, and I just thought "what the heck", we might as well try it!

And wouldn't you know it?! No tears and no screaming. Not a peep came out of that room once we turned off the lights and closed the door. Elliott was silent.
I, however, was a wreck! I was just imagining spending the entire night on Ellie's bedroom floor trying to console a scared baby in her new big girl bed.

That so wasn't the case!
And while Elliott may have fallen asleep like this:
She did, in fact, fall asleep!
And again today, she took her morning nap with no problems!
She may have slept on the floor next to the door, but I don't really see that as a problem, hehe!
I'm sure she'll soon figure out that her bed is much comfier than the floor.

I feel so blessed that Ellie seems pretty resilient and "chill" when it comes to big changes. She never ceases to amaze me. Whether it be using the potty, or throwing the world's biggest tantrum in the middle of Ikea, this girl is something special :)

I'm so excited to share before and after pictures of Ellie's bedroom, but that will have to wait for another day.
I hear a pretty little girl knocking on her door, ready to get up from her nap :)

~Amanda